
Stop Scripting Your Setup: Why You Should Try Nix Home Manager
We have all been there. You get a fresh laptop, or maybe you finally decide to wipe your current machine to start over. The first hour feels great, but then the reality sets in: you have to configure everything again.
Even if you are organized, it is a pain. You might have a repository of dotfiles and a few shell scripts you wrote three years ago to bootstrap your environment. You run them, and they mostly work. But then you start noticing the cracks. It doesn’t feel exactly like your other machine.
Maybe you start working and realize you are missing a specific config file for a tool you rarely touch but desperately need. Or perhaps you spent hours months ago researching an obscure flag to make a CLI utility behave a certain way, and now that setting is gone. Your muscle memory betrays you because your keyboard shortcuts aren’t quite right.
Then there is the issue of secrets. You can’t exactly check your SSH keys or API tokens into a public GitHub repository. So you end up manually copying files from a USB drive breaking any hope of full automation.
The problem gets worse if you juggle multiple machines, like a corporate MacBook for work and a Linux desktop at home. Keeping them in sync is a full-time job. Even if you manage to copy the config files, the underlying software might be different. You might have ripgrep version 13 on one machine and version 11 on the other, and you don’t realize the syntax has changed until your scripts fail.
There is a better way
This is usually where people talk about Nix and NixOS. If you haven’t heard of Nix, it’s a package manager and language that focuses on reproducibility. NixOS is a Linux distribution built entirely around this concept.
But here is the thing: you don’t need to switch your operating system to NixOS to solve these problems.
If you are on a company-issued MacBook, you obviously can’t install a new OS. If you are on Ubuntu and don’t want to reinstall everything, that’s fine too. You can install the Nix package manager on any Linux distro or macOS.
Once you have Nix, you can use Home Manager.
Home Manager allows you to manage your user environment using the Nix language. Instead of running imperative commands (like apt install, brew install, or manually edit text files), you describe the state you want your machine to be in.
You write a single configuration file that says “I want these programs installed,” “I want Git configured with this email and these aliases,” and “I want my shell to look like this.”
Why it solves the headache
When you use Home Manager, your environment becomes portable code. You can apply that configuration to a new machine, and it will pull down exactly what you specified.
Syncing is automatic. Because the configuration is text, you can version control it. When you make a change to your vim configuration on your personal machine, you push it to your repo. When you get to work, you pull the repo, run the Home Manager switch command, and your work machine is instantly updated to match.
No more version mismatches. Nix allows you to pin packages to specific commits. If you need a specific version of Node.js or Python to make your workflow function, you declare it. Home Manager ensures that exact version is installed, regardless of what the underlying operating system thinks is “current.”
Safe experimentation One of the best features is the ability to roll back. Let’s say you decide to try out a totally different shell configuration or a new terminal emulator. You change your config and switch. If you hate it, you don’t have to spend hours undoing your mess. You just switch into the previous status and your system is exactly how it was five minutes ago.
					// 1. Definiamo i frammenti di codice GLSL da iniettare
const shaderReplacements = [
  {
    shaderType: 'Fragment',
    // Inseriamo le dichiarazioni delle uniform globali
    originalValue: '//VTK::Output::Dec',
    replaceFirst: false,
    replacementValue: `//VTK::Output::Dec
      uniform vec3 uSphereCenter;  // Centro della zona di interesse
      uniform float uSphereRadius; // Raggio della maschera
      uniform int uInvertMask;     // Toggle per invertire l'effetto
    `
  },
  {
    shaderType: 'Fragment',
    // Intercettiamo il momento in cui il raggio campiona il colore
    originalValue: '      tColor = getColorForValue(tValue, posIS, tstep);',
    replaceFirst: true,
    replacementValue: `      tColor = getColorForValue(tValue, posIS, tstep);

      // Calcoliamo la distanza del punto corrente dal centro della sfera
      float dist = distance(posIS, uSphereCenter);

      // Logica di clipping: se il punto è fuori dal raggio, lo rendiamo trasparente
      bool isOutside = dist > uSphereRadius;
      if (uInvertMask == 1) isOutside = !isOutside;

      if (isOutside) {
          tColor.a = 0.0; // "Scartiamo" visivamente il campione
      }
    `
  }
];

// 2. Applichiamo le sostituzioni al mapper del volume
volumeMapper.getViewSpecificProperties().OpenGL = {
  ShaderReplacements: shaderReplacements
};
3.2 Gestione dinamica delle variabili Uniform
Per garantire l’interattività (es. spostamento della ROI tramite interfaccia utente), i valori devono essere trasmessi dal codice JavaScript alla GPU durante il ciclo di rendering. vtk.js permette tale operazione agganciandosi al contesto WebGL tramite la funzione setCustomShaderAttributes, assicurando una risposta fluida alle variazioni dei parametri clinici.
					// Funzione da chiamare ad ogni aggiornamento della scena o della UI
function updateShaderUniforms() {
  const openGLRenderWindow = fullScreenRenderer.getApiSpecificRenderWindow();

  // vtk.js espone un hook per aggiungere logica durante il build del programma
  volumeMapper.setCustomShaderAttributes(['uSphereCenter', 'uSphereRadius', 'uInvertMask']);

  // Utilizziamo l'API di basso livello per inviare i dati
  const publicAPI = volumeMapper.getViewSpecificProperties().OpenGL;
  publicAPI.AddShaderVariable8f = (program) => {
    program.setUniform3f('uSphereCenter', currentCenter.x, currentCenter.y, currentCenter.z);
    program.setUniformf('uSphereRadius', currentRadius);
    program.setUniformi('uInvertMask', maskInverted ? 1 : 0);
  };

  renderWindow.render();
}
3.3 Risultati
L’utilizzo di un approccio basato su custom shader per la manipolazione visiva presenta vantaggi significativi rispetto alle tecniche tradizionali:
- Performance: Il processo di clipping viene eseguito in parallelo per ogni pixel dalla GPU, rendendo più facile il mantenimento di frame rate costante di 60 fps.
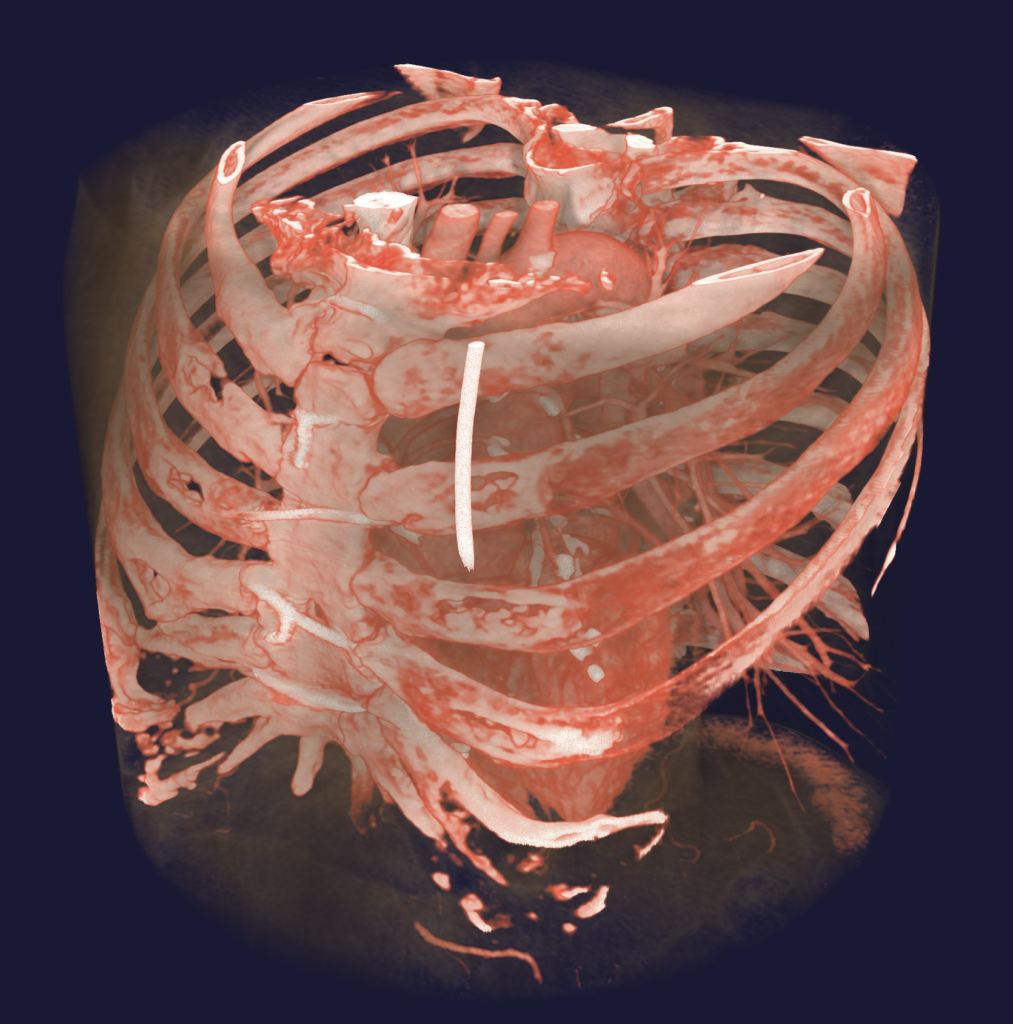
- Integrità del dato: Il dataset vtkImageData originale rimane inalterato, assicurando che i valori di densità (es. Unità Hounsfield) rimangano accurati per scopi diagnostici.
- Flessibilità: La possibilità di modificare la geometria della maschera (sferica, cubica) o applicare effetti di trasparenza parziale (ghosting) richiede esclusivamente minime variazioni nel codice GLSL.
4. Conclusione
Questo breve esempio vuole dimostrare come vtk.js rappresenti un efficace ponte tra la potenza del calcolo scientifico tradizionale e la flessibilità delle moderne tecnologie web. La capacità di interagire direttamente con la GPU tramite shader personalizzati, pur mantenendo la struttura rigorosa della pipeline VTK, permette la creazione di interfacce diagnostiche di alta precisione.